Thursday, February 16, 2017
Thursday, February 9, 2017
Blog Entry #3 Bokeh
Blog Entry #3 should include 3 of your own bokeh shots, please follow
the guidelines and tips to get you started with bokeh photography:
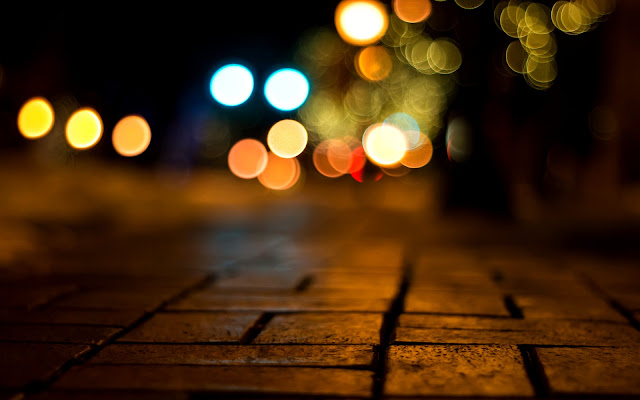
Bokeh comes from the Japanese word ‘boke’, which means fuzzy. In photography, bokeh defines the quality of the blurred lights presented in a photo. We’re not referring to a badly taken photo that’s all out of focus, but rather the aesthetically pleasing background blur. Usually, this type of blur highlights the focused subject even more.
Producing nice bokeh involves creating a shallow depth of field.
- Larger aperture works best, so use a low f-stop number like f1.4, f1.8 or f2.8.
- Set your camera to aperture priority.
- You would need to set the shutter speed faster than 1/50 second. If any slower you might find background lights getting blurred together, instead of rendering small circles. If it’s too dark, increase the ISO level rather than the f-stop number.
- The closer you get to subject, the better. If you’re using a zoom lens, extend it to the longest focal length.
- The further away the background the better.
- Background must be lit. Glowing lights like street lamps and traffic lights are good sources for subjects
- If you don’t have a subject and want to create the bokeh effect with the night lights, manually focus your camera.


Blog Entry #2 Example - Aperture Comparison
 | |||
| Settings: Shutter speed 1/50, Apertures maxed out at f/1.8 and f/1.4, ISO 200 and Auto White Balance. |
Subscribe to:
Comments (Atom)